Where to Turn in iPhone: A Practical Trade-In & Repair Guide
Learn where to turn in your iPhone for trade-in or repair, how to prep data, verify eligibility, and choose trusted programs from Apple, carriers, or reputable retailers in 2026.

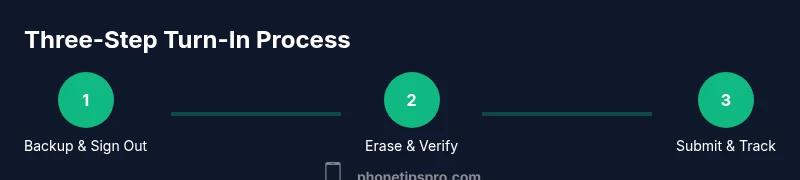
To turn in your iPhone, start with trusted options (Apple Trade In, carrier programs, or reputable third-party retailers). Back up data, sign out of accounts, and erase the device. Compare estimated values, timelines, and required documents before submitting, then follow the program-specific steps to complete the turn-in smoothly.
Why turning in your iPhone matters
According to Phone Tips Pro, deciding where to turn in your iPhone begins with clear goals: maximize value, protect your privacy, and simplify the process. For most users, the best path balances financial return with data security and convenience. This guide will walk you through practical options, privacy steps, and how to choose a trusted program in 2026.
Turn-in options explained: Apple Trade In, carriers, and third-party retailers
There are three primary avenues to turn in an iPhone. Apple Trade In is often straightforward, with value tied to device condition and model. Carrier programs can be convenient if you’re upgrading on the same network and may offer monthly credits or reduced device costs. Third-party retailers or buyback sites frequently provide competitive offers, but terms and data-handling policies vary. Always read the fine print and compare values, timelines, and any fees before you decide.
Preparing your data and accounts
Before you send in your iPhone, back up all relevant data (photos, contacts, apps, and messages) to iCloud or a computer. Sign out of iCloud, iMessage, and FaceTime, and disable Find My iPhone to avoid Activation Lock. Having a recent backup and signed-out device reduces the risk of data loss and ensures a smoother turn-in experience. Use strong Wi-Fi and a secure connection when backing up or transferring data.
Security steps: erase and disable Activation Lock
Erasing your iPhone is a critical privacy step. Go to Settings > General > Transfer or Reset iPhone > Erase All Content and Settings, or wipe the device via iCloud if the phone is unreachable. After erase, you should see the setup screen, confirming the device is reset. If you can’t access the phone, sign out remotely where possible and confirm that Find My iPhone is off before sending the device away.
How to evaluate offers and timelines
Offer values depend on model, storage, condition, and demand. Apple Trade In values are generally based on model and condition, while third-party services may provide quick cash or gift cards. Carriers might offer credits toward a new device or service. Compare each option’s value ranges, estimated processing times, and whether shipping is free or if you must visit a store. Don’t rush; a slightly higher offer elsewhere can offset shipping time.
Documentation and proof of ownership
Many programs ask for a government-issued ID or the device’s original proof of purchase. Have your ID ready and keep any trade-in enrollment numbers handy. If you’re trading in with a carrier, you may need your account number, plan details, and the device’s IMEI/MEID. Missing documents can delay processing or lower the final offer.
What to do if your device is damaged
Damage can affect the trade-in value or eligibility. Check the program’s terms for damaged devices, as some will accept them at a reduced rate or require a separate assessment. If the screen, battery, or water damage is significant, consider a repair path before trading in to maximize value, or opt for a buyback service that accepts damaged devices.
Shipping, drop-off, and receipt tracking
If your program requires shipping, package the iPhone securely in its original box or a sturdy alternative, remove personal accessories, and use tracked shipping. Save the receipt and any tracking numbers until the trade-in is confirmed. If you’re delivering in-store, request a receipt and document the device’s condition at hand-off.
Authority sources you can trust
For consumer guidance on trade-in practices, you can consult official resources and major publications. FTC consumer information and privacy guidelines offer general tips on protecting data during device exchanges. NIST’s data sanitization guidelines provide best practices for securely erasing media. Reputable tech outlets such as The Verge and CNET regularly cover trade-in programs and best practices.
Tools & Materials
- iPhone device (model and storage noted)(Ensure device is charged and accessible for data backup.)
- SIM ejector tool (or paperclip)(Remove SIM before trade-in when requested.)
- USB-C to USB-C or Lightning cable(For backing up or transferring data to a computer.)
- Computer or fresh Wi‑Fi-enabled device(Used for data backup and device erasure steps.)
- Backup copy (iCloud or computer)(Recent backup of photos, contacts, and apps.)
- Apple ID credentials(Needed to sign out and disable Find My iPhone.)
- Proof of purchase (optional)(May help verify ownership for certain programs.)
Steps
Estimated time: 30-60 minutes
- 1
Back up data
Back up all important data to iCloud or a computer so you can restore later if needed. Ensure photos, contacts, messages, and app data are included. A current backup protects against data loss during erasure.
Tip: Verify the backup completed successfully before proceeding. - 2
Sign out and disable Activation Lock
Sign out of iCloud, iMessage, and FaceTime, and disable Find My iPhone to remove Activation Lock. This step prevents future access to the device and ensures the trade-in value isn't affected.
Tip: Have your Apple ID password handy. - 3
Erase all content and settings
Erase the device to factory settings so the new owner or program can set it up. This is irreversible; confirm you have a backup before proceeding.
Tip: If the phone is inaccessible, erase via iCloud remotely where possible. - 4
Choose a turn-in path
Decide between Apple Trade In, carrier program, or third-party retailer based on value, convenience, and processing time. Consider any shipping costs or eligibility requirements.
Tip: Compare offers from at least two options to maximize value. - 5
Prepare for drop-off or shipment
If dropping off, bring a valid ID and the device in its original or protective box. If shipping, use trackable packaging and keep the tracking number until processing.
Tip: Photograph the device condition before shipping for your records. - 6
Confirm completion and receive payment
Follow the program’s tracking updates or receipt to confirm the turn-in was received. Save the final payment or credit details in case of disputes.
Tip: Check payment method (gift card, credit, cash) and expected timeline.
FAQ
What does 'where to turn in iPhone' mean in practice?
It means selecting a channel to exchange your iPhone for value or repair—Apple Trade In, carrier programs, or reputable third-party retailers. Each option has different value, timelines, and requirements.
Turning in means choosing a program to exchange your iPhone for value or service, with different options.
Can I erase my iPhone remotely?
Yes, if Find My iPhone is enabled, you can erase the device from iCloud. Ensure you also sign out of iCloud and remove Activation Lock if possible before sending it in.
If Find My iPhone is on, you can erase it from iCloud to protect your data.
Will trade-in affect my data?
Erasing the iPhone before trade-in ensures data is no longer accessible. Back up first and confirm the device is reset to factory settings before submission.
Back up your data, then erase the device so your data isn’t exposed.
What documents do I need for trade-in?
Typically a government ID and, in some cases, proof of purchase or trade-in enrollment numbers. Availability varies by program, so check the specific requirements.
Bring a government ID and any enrollment numbers required by the program.
What about Activation Lock during trade-in?
Activation Lock should be disabled before submission. If you can't disable it, contact support for guidance and avoid later issues with the program.
Make sure Activation Lock is off so the new owner can set up the phone.
How long does the process take?
Processing times vary by program but typically range from a few days to a couple of weeks, depending on shipping and verification steps.
Expect a few days to a couple of weeks depending on the program and shipping.
Watch Video
Quick Summary
- Back up data before erasing.
- Choose the best turn-in option by comparing value and timeline.
- Disable Find My iPhone to avoid Activation Lock.
- Keep receipts and tracking numbers for proof of submission.