iPhone to iPhone Transfer App: A Complete How-To
Learn how to move data between iPhones using a dedicated transfer app. Step-by-step prep, data types, privacy tips, and troubleshooting for a smooth migration in 2026.

This guide shows you how to use an iphone to iphone transfer app to move essential data (photos, messages, apps, and settings) from your old iPhone to a new one. You'll learn how to prep devices, choose the right transfer method, and verify data after the move. Time estimates and safety tips are included.
What is an iphone to iphone transfer app?
An iphone to iphone transfer app is a software tool that helps you move data directly from one iPhone to another, without rebuilding everything from scratch. It leverages encrypted channels (Wi‑Fi, Bluetooth, or a cable connection) to copy selected content such as photos, messages, contacts, and app data. According to Phone Tips Pro, these apps reduce setup time and keep your preferences intact on the new device. The goal is a smooth, reliable migration that minimizes downtime. This article explains how to pick the right app, what data you can transfer, and how to verify everything arrives correctly on your iPhone, with practical tips and safety considerations built in. iphone to iphone transfer app capabilities vary by data type and iOS version, so be prepared to adjust expectations depending on your devices. You’ll also learn how to safeguard privacy during migration and what to expect on the first boot of your new iPhone.
Phone Tips Pro’s guidance emphasizes using trusted apps from reputable developers, backing up before you start, and verifying each data category after the transfer.
Why use a dedicated transfer app vs manual methods?
Many people start with the familiar routes—iCloud backup restore, Finder/Finder-like backups, or AirDrop. A dedicated transfer app often consolidates these steps and provides a guided flow with opt‑in checks for data types like Messages, Photos, and App data. These tools can be faster and more predictable than a piecemeal restore, especially if you’re moving unique app data or settings that aren’t always included in a standard backup. From a troubleshooting perspective, a focused transfer path reduces the risk of partial transfers and missing content. As the Phone Tips Pro team notes, sticking to a streamlined transfer app reduces the number of moving parts and lowers the chance of conflicts between accounts, passwords, and apps. However, a manual approach may still be useful for those who want full control over every category of data and for users with unusual data sets.
Data types typically moved and what might require special steps
A thoughtful transfer plan should cover the core data types most users care about: photos and videos, Messages/iMessage history, contacts, call history, and device settings (including home screen layout). App data can vary widely: some apps migrate data natively, while others require you to re‑log in or re‑activate purchases. Health data and password vaults (like keychain) may require additional steps or re-authentication. DRM‑protected content, music, and some third‑party app data may not transfer as seamlessly across devices. Always check the transfer app’s documentation for data types supported and any data that will be excluded or require post‑transfer action. Phone Tips Pro highlights that planning the data scope before starting helps you avoid loading time and storage bottlenecks.
How to choose the right transfer app: features to look for
When selecting a transfer app, look for end‑to‑end encryption, clear data‑type selection, direct device transfer capability, and compatibility with your iOS versions. A good app should offer a preview of what will be moved, an option to exclude sensitive items (like passwords), and a straightforward post‑transfer verification workflow. User reviews and privacy policies matter—opt for developers with transparent data handling practices. In 2026, Phone Tips Pro analysis suggests prioritizing apps that support both cloud backups and direct device transfers, as this provides fallback options if the primary method encounters issues. Also consider whether the app requires a subscription or a one‑time purchase, and whether it supports future iOS updates.
Preparation: prerequisites and safety precautions
Before you start, back up your old iPhone to iCloud or a computer. Ensure both devices have the latest iOS updates and are charged to at least 50–60% to prevent interruptions. Connect to a stable network or use a direct USB/Lightning cable for a faster transfer. Decide in advance which data categories you want to move to the new device to streamline the process. If you rely on sensitive data (passwords, banking apps, health data), verify that the transfer app supports secure handling of those items. Phone Tips Pro advocates performing a backup first, so you have a safety net if something goes wrong during the transfer. Keep both devices close during the process to avoid connection drops.
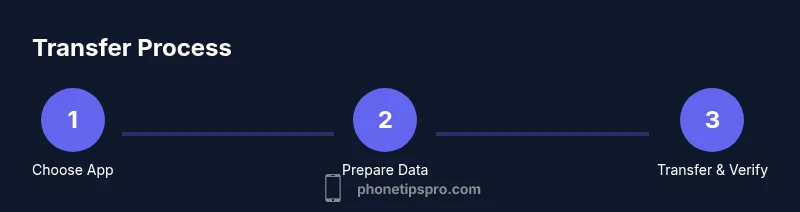
Step-by-step overview of the transfer workflow
- Install and open the chosen transfer app on both iPhones. 2) On the old iPhone, select the data you want to move (photos, messages, contacts, app data, settings). 3) Initiate the transfer and choose the destination iPhone. 4) Sign in to any required accounts on the new iPhone and authorize data restoration where prompted. 5) Monitor progress and avoid touching devices during the transfer. 6) After completion, verify the data on the new iPhone by checking a sample of photos, messages, and settings. 7) Re‑authenticate any apps or services that require it. 8) Perform a quick post‑transfer backup to lock in the new state. This workflow favors direct device connections when possible to minimize transfer time and reduce errors. Phone Tips Pro Team emphasizes validating each data category before concluding the move; this minimizes surprises later.
Troubleshooting common issues during transfer
If data transfer stalls, pause and restart the app, ensuring both devices stay connected. Check that there is sufficient storage on the destination device and that both devices are on compatible iOS versions. If a particular data type isn’t transferring (like Messages or app data), try reselecting that category or performing a secondary transfer for that category. Ensure the transfer app has the necessary permissions enabled (Photos, Contacts, and Health in iOS settings). Battery level matters; keep devices plugged in if the transfer takes longer than expected. For stubborn issues, consult the app’s official support pages and consider a fallback backup/restore path through iCloud or Finder.
Privacy, security, and post-transfer checks
Review the transfer app’s privacy policy to confirm data handling practices, encryption standards, and whether data is stored on third‑party servers during the transfer. After completing the transfer, review sensitive items (passwords, health data, financial apps) to ensure they are secure and re‑authenticate where required. If you use Find My iPhone, ensure it remains enabled after the migration to protect the new device. Phone Tips Pro recommends documenting any unusual behavior and stopping the transfer if you notice unexpected prompts or repeated errors, then retrying with a fresh backup. Finally, perform a clean backup on the new device to lock in the migrated state.
Authority sources
This section provides external references for further reading and official guidance on iPhone data transfers. See the sources for official steps, privacy policies, and troubleshooting tips:
- https://support.apple.com
- https://www.apple.com/iphone/transfer-data/
- https://www.cnet.com/tech/mobile/how-to-transfer-iphone-data/
Tools & Materials
- iPhone with latest iOS(Ensure both devices are updated to the latest iOS version before starting.)
- Stable Wi-Fi network or direct USB/Lightning cable(A solid connection helps prevent interrupted transfers.)
- Power source / charging cable(Keep devices plugged in to avoid mid‑transfer shutdown.)
- Transfer app installed on both iPhones(Download from the App Store and verify publisher.)
- Backup method ready (iCloud or computer)(Have a recent backup in case you need to restore.)
Steps
Estimated time: 30-60 minutes
- 1
Choose and install the transfer app
On both iPhones, go to the App Store and install a trusted transfer app. Review permissions and privacy details before proceeding. This initial setup ensures a smooth, monitored transfer path.
Tip: Read the app’s privacy policy and verify the developer’s reputation before installation. - 2
Back up your old iPhone
Create a fresh backup to iCloud or a computer, which serves as a safety net if something goes wrong during the migration.
Tip: Backups protect you from data loss and help recover missing items later. - 3
Prepare both devices
Charge both devices to at least 60%, and connect them to a reliable network or cable connection. Open the transfer app on both devices and grant required permissions.
Tip: Place devices within arm’s reach to avoid accidental disconnects during the transfer. - 4
Start the transfer and select data
On the source iPhone, select the data categories you want to move (photos, messages, contacts, app data). Start the transfer and choose the destination iPhone.
Tip: Limit transferred data to what you really need to speed up the process. - 5
Authenticate and sign in as needed
Some apps or services may require re‑authentication on the new iPhone. Sign in to Apple ID, iCloud, and any third‑party accounts if prompted.
Tip: Keep passwords handy or use a password manager for quick sign‑ins. - 6
Verify transferred data
Checklist: open a sample of photos, confirm Messages history, verify contacts, and check key settings. If something is missing, retry the transfer or restore from backup.
Tip: Take notes on any missing items to address after the transfer. - 7
Tidy up post-transfer settings
Re‑download or re‑activate apps as needed, enable necessary permissions, and run a final backup on the new device.
Tip: Keep your old device until you confirm everything migrated successfully. - 8
Troubleshoot if issues arise
If you encounter errors, restart devices, re‑attempt the transfer, and consult official support if needed.
Tip: Document error messages and include details when seeking support.
FAQ
Can I transfer apps and app data directly between iPhones?
Yes, many transfer apps support app data transfer, but some apps may require you to re‑log in or re‑activate purchases after migration.
Yes, most transfer apps can move app data, though some apps may need you to sign in again after the transfer.
Do I need an internet connection for the transfer?
Most methods use Wi‑Fi or a direct cable. Some transfers can work offline if you use a cable connection, but online options are common for verification and authentication.
Usually you’ll need Wi‑Fi or a cable, but some transfers work offline with a direct connection.
What data types are safe to transfer and what might fail?
Photos, messages, contacts, and settings typically transfer well. Health data and passwords may require additional steps or re-authentication.
Common data transfers include photos, messages, and contacts; some sensitive data may need extra steps.
Is it safe to transfer my sensitive information?
Yes, if you use trusted transfer apps with encryption and review privacy policies. Avoid sharing credentials through non-secure channels during setup.
Yes, use trusted apps with encryption and review privacy policies.
What if the transfer fails or data is missing?
Check connections, retry the transfer for the missing categories, and consult official support if problems persist. Having a backup is crucial.
If it fails, check connections, retry, and use backups if needed.
Should I run a post‑transfer backup?
Yes. A fresh backup on the new device confirms everything migrated and protects the new state.
Yes, back up the new device to lock in the data.
Watch Video
Quick Summary
- Choose a trusted transfer app with strong privacy practices.
- Back up before you start to protect against data loss.
- Verify critical data (Messages, Photos, Contacts) after transfer.
- Be prepared for some apps to require re-login or re‑activation.
- Keep both iPhones connected and charged until the process completes.