Moving from Android to iPhone: A Practical Guide
Move from Android to iPhone with ease. This step-by-step guide covers data transfer, prerequisites, setup tips, and post-move checks for a smooth switch.

Moving from Android to iPhone is easy with Apple's Move to iOS during setup. You can transfer contacts, messages, photos, videos, calendars, and mail accounts. You’ll need both devices charged, a stable Wi‑Fi connection, and your Google or Microsoft accounts ready. This guide walks you through prerequisites, the transfer steps, and post-move checks.
Why switch: a practical mindset for moving from Android to iPhone
According to Phone Tips Pro, the decision to move from Android to iPhone isn't about hardware alone; it's about how you use your data and apps. The iPhone ecosystem is designed for a smoother handoff via iCloud and Apple's Move to iOS during setup. Expect differences in default apps, notification settings, and privacy controls. Planning ahead reduces friction when you start over on iOS. Phone Tips Pro emphasizes starting with a clean audit of your data, then migrating the essentials first. For many users, the biggest wins come from moving contacts, calendars, photos, and messages, then reconfiguring mail and messaging apps on the iPhone. If some apps aren't available on iOS, you'll want to note alternatives and be prepared to recreate custom settings. By the end of this guide, you'll have a clear map to switch with minimal downtime.
Phone Tips Pro's approach also suggests beginning with a backup on Android, auditing connected accounts, and listing the must-move data to avoid friction later. It’s common to value contacts, photos, and calendars first, then tackle emails and notes. If you rely on specific apps, look for iOS equivalents and prepare to re-create preferences after the move. The goal is to align your data and workflows with iCloud and iPhone defaults so your daily routines feel natural from day one.
What data can transfer and how
Data commonly moved from Android to iPhone includes Contacts, Calendars, Text Messages, Photos, Videos, and Email accounts. When you use Move to iOS during the iPhone setup, these categories are typically migrated to the new device. Photos and videos can also migrate via a direct Wi‑Fi transfer or later through iCloud Photos if you enable it. Apps themselves don’t transfer between ecosystems; you’ll need to install iOS versions from the App Store and sign in to any cross‑platform accounts to restore data like chat histories or notes. Certain settings, wallpapers, and ringtones may need manual reconfiguration on iOS. If you rely on Google or Microsoft accounts, signing in on the iPhone will restore access to those services where supported. Prioritize moving contacts, calendars, and photos first, then address emails and notes afterward.
As you plan, remember that some data might be available only via app‑specific backups. Review each data category and decide what to move first to minimize downtime after setup. This is where careful preparation pays off and aligns with best practices from Phone Tips Pro.
Tools and prerequisites you’ll need
Before you begin, gather a few things to avoid delays. You’ll want both devices ready, a solid Wi‑Fi network, and your account credentials handy. Essential items include:
- Android device with data to transfer (required, unlocked and charged)
- iPhone with the latest iOS installed (required)
- Stable Wi‑Fi connection (required)
- Apple ID and password (required)
- Move to iOS app installed on the Android device (required during setup)
- USB‑C to Lightning cable or adapter (optional, for wired transfer if Wi‑Fi is unreliable)
Bonus: perform a recent backup on Android before starting so you can recover anything that doesn’t transfer automatically, and have a plan to re‑install or re‑authorize apps on iOS.
Move your data: Step-by-step migration overview
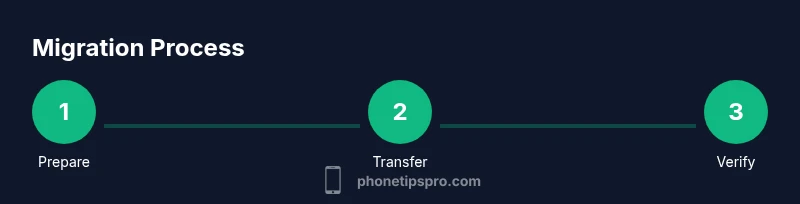
The migration process centers around two devices and the initial iPhone setup. Start your iPhone from scratch and choose the option to move data from Android. You’ll connect the Android device to the iPhone’s temporary Wi‑Fi network, then select the data you want to transfer. After the transfer completes, finish setting up the iPhone by signing into your Apple ID and configuring essential apps. If you encounter missing data after the move, you can re‑install apps from the App Store and re‑sign into cross‑platform accounts to sync data again. This overview captures the core workflow; the step-by-step section below provides precise actions to minimize errors during the transfer, with practical tips for real‑world situations.
Phone Tips Pro notes that most users experience a smooth transition when data categories are prioritized and when they keep both devices charged and within reach during the transfer.
Common pitfalls and how to avoid them
Data transfer can fail if devices disconnect or run out of battery. Always start with a full charge and stable power supply on both devices. Do not attempt to transfer sensitive data over unstable public Wi‑Fi; use a trusted network or your home Wi‑Fi. Some apps aren’t available on iOS or don’t support cross‑platform data transfer; prepare to install iOS versions and log in with the same accounts. If you rely on cloud backups (like Google Drive or OneDrive), ensure you re‑authorize them on iPhone after setup. Finally, avoid changing account information during the transfer window to prevent synchronization conflicts.
The key is to stay organized: list the must-move items, keep backups handy, and verify critical data after the move. Phone Tips Pro emphasizes that a calm, methodical approach reduces the risk of losing data or encountering app incompatibilities.
After migration: verify, organize, and optimize
Once the transfer completes, take time to verify that core data arrived intact. Check contacts, calendars, and messages across devices, then review photos and videos for completeness. Sign into your email accounts, chat apps, and cloud storage services on the iPhone, and reinstall any essential apps from the App Store. Organize apps into folders that mirror your Android layout to keep your workflow familiar. If you use a Google or Microsoft account for productivity, ensure the account is connected and syncing properly. Finally, explore iPhone‑specific features (Lock Screen widgets, Focus modes, and privacy settings) to tailor your device to your daily routines. The Phone Tips Pro team recommends a brief, final data audit and a practice run with a few typical tasks to confirm everything works as expected.
Authority sources
- Apple Support: Move data from Android to iPhone — https://support.apple.com/en-us/HT201269
- Android Official Help: Transfer data between Android and other platforms — https://www.android.com/transfer-data/
- Additional guidance on data transfer best practices — https://www.nist.gov
Tools & Materials
- Android smartphone with data to transfer(Unlocked, charged; ensure you have a recent backup)
- iPhone with latest iOS(New or reset device; ready for setup)
- Stable Wi‑Fi network(Prefer private, high‑bandwidth connection)
- Apple ID credentials(Needed to sign in and enable iCloud/App Store)
- Move to iOS app(Installed on the Android device during setup)
- USB‑C to Lightning cable (optional)(Useful if you experience unstable Wi‑Fi or for wired transfer)
Steps
Estimated time: 25-45 minutes
- 1
Prepare devices and backups
Charge both devices to at least 70%. Update both phones to the latest OS versions. On Android, create a recent backup and ensure your Google/Microsoft accounts are up to date. This minimizes data loss if anything transfers incompletely.
Tip: Back up Android locally in addition to cloud backups to reduce risk. - 2
Install Move to iOS on Android
Download Move to iOS from Google Play and open it. Read the terms, grant necessary permissions, and prepare to connect to the iPhone’s temporary Wi‑Fi network during setup.
Tip: Keep the Android device within arm’s reach during the transfer. - 3
Start iPhone setup and select data transfer
Turn on the iPhone and begin the setup process. Choose ‘Move Data from Android’ when prompted to access the transfer screen. A one‑time code will appear on the iPhone.
Tip: If you don’t see the option, reset the iPhone to factory settings and start again. - 4
Connect and select data to transfer
On Android, enter the code shown on the iPhone to establish a secure connection. Choose the data you want to transfer (contacts, messages, photos, calendars, etc.) and start the transfer.
Tip: Limit transfer to essential data first to speed up the process. - 5
Finish setup on iPhone and sign in
Complete the iPhone setup, sign in with your Apple ID, and follow prompts to restore backed‑up data as needed. Install essential apps from the App Store and sign in to cross‑platform accounts.
Tip: Enable iCloud Photos and iCloud Drive to keep content synced across devices. - 6
Verify data and reconfigure apps
Go through Contacts, Calendar, Messages, Photos, and email accounts to confirm everything migrated correctly. Reinstall any Android‑only apps as iOS equivalents and re‑authorize services where required.
Tip: Keep your Android accessible until you confirm data parity on iPhone.
FAQ
Can I transfer apps from Android to iPhone?
Most Android apps don’t transfer to iPhone. You’ll need to install the iOS versions from the App Store and sign in again to restore any data tied to an account. Some apps offer cross‑platform backups that sync data, but you’ll manage them on a per‑app basis.
Most Android apps don’t transfer to iPhone, so you'll install the iOS versions and sign in again.
Will my contacts transfer?
Yes. If you use Move to iOS or sign into your Google or Microsoft accounts on the iPhone, contacts can migrate to the new device. Double‑check your contact groups after setup.
Yes—contacts usually transfer when you use Move to iOS or sign into the same accounts on iPhone.
What about photos and videos?
Photos and videos can be moved during the Move to iOS setup or later via iCloud Photos. If you use Google Photos or another service, sign in on iPhone to sync your media.
Photos and videos transfer via Move to iOS or can sync later with iCloud Photos.
Do I need to keep my Android active during transfer?
Yes—keep both devices powered and within range during the transfer to prevent interruptions. A pause may require restarting the transfer.
Yes, keep both devices powered and close during the transfer.
Is Move to iOS free?
Move to iOS is a free app provided by Apple and is designed specifically to help users migrate data from Android to iPhone.
Yes, Move to iOS is free.
Watch Video
Quick Summary
- Plan data first: prioritize contacts, calendars, and photos.
- App availability differs: install iOS versions and sign in to cross‑platform accounts.
- Verify data after transfer and re‑authorize services.
- Leverage iCloud and Apple ID settings to simplify ongoing syncing.