How to Check for iPhone Warranty: A Step-by-Step Guide
Learn how to verify your iPhone warranty quickly and accurately. This educational guide covers AppleCare, standard warranty, and how to interpret coverage on Apple's site, with practical steps and tips from Phone Tips Pro.

With this guide, you’ll verify your iPhone warranty status quickly: locate your serial number, visit Apple’s Check Coverage page, and read the results. You’ll learn how to verify AppleCare coverage, identify expiration dates, and determine eligibility for service. All steps can be completed on iPhone or a computer, with or without the original receipt.
Why Checking Your iPhone Warranty Status Matters
Understanding your warranty status helps you plan repairs, decide whether AppleCare applies, and avoid unexpected charges. This guide covers how to check for iphone warranty status and what that status means for service options. According to Phone Tips Pro, many iPhone owners underestimate the value of staying informed about coverage after repairs or replacements. When you know your current status, you can choose the most cost‑effective path to service, whether that means a quick screen replacement under limited warranty or a paid diagnosis for a non‑covered issue. This knowledge is also useful if you’re planning to sell or trade in your device, since warranty terms can affect eligibility for service and resale value. In this section we’ll outline what counts as standard warranty, what AppleCare adds, and how to verify status on Apple’s official sites. For context, Phone Tips Pro Analysis, 2026 emphasizes that proactive checks reduce surprises during device ownership. By the end of this block you should be ready to gather your device information and begin the check confidently.
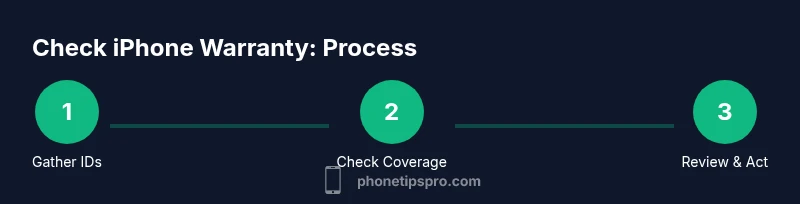
How to Locate Your iPhone Serial Number and IMEI
Every iPhone has a serial number and often an IMEI that Apple uses to identify coverage. Start by opening the Settings app and going to General > About to view the serial number. For the IMEI, you can dial *#06# on most models, or check the SIM tray label. If the device is unavailable, you can still find these codes on the original box, receipt, or by logging into your Apple ID account on another device. Having both numbers handy speeds up the warranty check and reduces the chance of typing errors. Keep your device untouched while collecting these details to ensure they map to the correct hardware.
Checking Warranty on Apple’s Website: Step-by-Step
To check your warranty, go to Apple’s official Check Coverage page. Enter your device’s serial number (and, if prompted, the IMEI). The results will show whether your iPhone is in the standard warranty, under AppleCare, or out of coverage. If AppleCare is active, you’ll see its start date and duration. If the page can’t locate your device, try rechecking the serial or contact Apple Support for verification. This section also covers how to verify AppleCare+ terms and what to do if your device has non‑authorized repairs, which can affect eligibility.
Interpreting Warranty Coverage and AppleCare
A clear understanding of coverage prevents confusion. A valid warranty typically covers manufacturing defects for a defined period, while AppleCare extends or modifies that protection. AppleCare+ may include accidental damage coverage with service fees. When you see a status like “Active” or “In Coverage,” note the expiration date and any service entitlements. If you see “Limited Warranty” or “Expired,” review the terms for possible paid options or service programs. Always cross‑check the coverages with your purchase date and any AppleCare enrollment records to avoid misinterpretation.
What If Your Warranty Has Expired or Is About to
If your status shows expired or near expiry, you still have options. Some issues may be eligible for out‑of‑warranty repairs at Apple or via authorized service providers at a fee. If you have AppleCare+, your coverage may extend for battery replacements or screen damage with reduced fees. If you don’t have AppleCare, compare diagnostic costs with third‑party repair options, though be mindful of voiding certain protections. In any case, document the diagnosis and price estimates for future reference and potential negotiations with the seller or provider.
How to Protect Your Warranty Going Forward
Proactively manage coverage by enrolling in AppleCare+ if it suits your device use, and keep all purchase receipts and service records organized. Regularly check your status after meaningful repairs or replacements, and note any changes in device condition. Enable reminders for renewal dates and keep a digital copy of your coverage for quick reference. The more you document, the easier it is to navigate future service needs and maximize the value of your investment.
Common Pitfalls and Quick Checks
Avoid common missteps such as confusing AppleCare with the standard warranty, failing to update coverage after a repair, or using non‑authorized repair services that can affect future eligibility. Always use the official Apple site or Apple Support app for checks, and confirm ownership if prompted. A quick two‑column checklist at the end of this block helps ensure you didn’t miss a key detail: (1) serial number accuracy, (2) current AppleCare status, (3) service eligibility, (4) renewal opportunities.
Practical Next Steps After Checking
- Save your results: take a screenshot or print the confirmation page. 2) If coverage is active, note the dates and plan details. 3) If coverage is missing or unclear, contact Apple Support for formal verification. 4) Schedule any renewal or enrollment actions before expiry. 5) Keep receipts and service logs for future warranty decisions. This practical workflow keeps you prepared for future repairs and trade‑in considerations.
Tools & Materials
- iPhone with internet access(Ensure device is accessible or have serial/IMEI handy)
- Web browser or Apple Support app(Check Coverage page on a computer or iPhone)
- Serial Number(Found in Settings > General > About or on original packaging)
- IMEI (optional)(Useful if requested by Apple Support)
- Proof of purchase (optional)(Helpful if ownership is questioned or for extenders)
- Notes or calendar for reminders(Track renewal dates and service windows)
Steps
Estimated time: Total time: 20-30 minutes
- 1
Gather device identifiers
Locate the serial number (Settings > General > About) and note the device model. If available, also record the IMEI from the SIM tray or device settings. This ensures you can verify coverage accurately.
Tip: Double‑check the serial number for any typos. - 2
Access the Check Coverage tool
Open a browser or the Apple Support app and navigate to the official Check Coverage page. This is the authoritative source for warranty and AppleCare status.
Tip: Use an official Apple link to avoid phishing sites. - 3
Enter your identifiers
Input the serial number (and IMEI if prompted). If multiple devices share a serial block (rare), ensure you select the correct model in the list.
Tip: Take your time to ensure the correct device is selected. - 4
Read the results
Review whether the device is under standard warranty, AppleCare, or out of coverage. Note start and end dates of each coverage type and any service entitlements.
Tip: Document the dates in your notes for future reference. - 5
Cross‑check ownership and receipts
If asked, verify ownership with your Apple ID or proof of purchase. This can affect eligibility and future service opportunities.
Tip: Keep a secure digital copy of receipts. - 6
Decide on next steps
If coverage is active, plan service within the allowed terms. If expired, compare paid repair options against replacement or extended coverage.
Tip: Request a written quote before committing to a paid repair. - 7
Save and organize results
Capture screenshots or export the results page. Store them with your purchase records for easy access during future service needs.
Tip: Create a dedicated warranty folder in your cloud drive.
FAQ
How can I check if my iPhone is under warranty?
Use Apple’s Check Coverage page and enter your device serial number. If needed, verify ownership with your Apple ID. If the site cannot locate your device, contact Apple Support for confirmation.
Check warranty status by entering your device serial on Apple's Check Coverage page, and contact support if you need help.
Does AppleCare extend the standard warranty?
Yes. AppleCare extends the coverage beyond the standard warranty and can include accidental damage protection, depending on the plan. Check the coverage details on Apple’s site.
AppleCare extends coverage beyond the standard warranty and may include additional protections.
Can I check warranty without my iPhone?
Yes. Use the serial number found on the original box or receipt, or sign into your Apple ID on another device to access coverage information.
You can check warranty without the device by using its serial number or your Apple ID on another device.
What if my warranty shows expired?
You can still get service, usually for a fee, from Apple or authorized providers. Compare costs with third‑party options, but ensure reputable service standards.
Expired warranty means service is usually paid; compare options and choose reputable providers.
Do I need proof of purchase to check warranty?
Not always required to view coverage, but proof of purchase can help verify ownership and the date of purchase when needed for service eligibility.
Proof of purchase helps confirm ownership and purchase date if service is needed.
How can I stay updated on warranty status?
Set reminders for renewal dates, keep digital copies of receipts, and periodically recheck coverage after any repairs or device changes.
Set reminders and recheck your coverage after repairs to stay updated.
Watch Video
Quick Summary
- Check warranty status before repairs.
- Use official Apple coverage tools for accuracy.
- Keep purchase receipts and service logs.
- AppleCare details influence service options.
- Document results for future reference.