How to Finish Transferring iPhone to iPhone
Learn how to finish transferring iPhone to iPhone with Quick Start, iCloud backups, or Finder transfer. Expert tips, safety steps, and troubleshooting for a seamless migration in 2026.

By the end of this transfer, your new iPhone will mirror your old device—apps, photos, messages, settings, and accounts—so you can pick up right where you left off. Start with the receiving iPhone, sign in with your Apple ID, and choose Quick Start, iCloud backup, or a direct device-to-device transfer. Both devices should run iOS 16+ and be on the same Wi‑Fi network or connected with a cable.
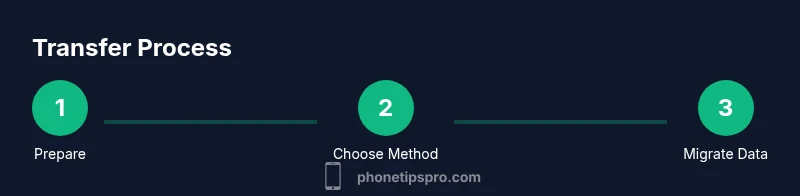
Prepare for the transfer
If you’re wondering how to finish transferring iPhone to iPhone, start by making sure both devices are ready for a smooth migration. According to Phone Tips Pro, the most reliable migrations begin with a fully charged phone, up-to-date iOS, and a stable connection. Update both devices to the latest iOS version you can reasonably install, back up anything you might not want to lose, and have your Apple ID credentials handy. This foundational preparation reduces the chance of interruption and ensures that your most important data—photos, messages, contacts—arrives on the new device intact.
- Charge both devices to at least 50% before starting.
- Connect to a stable Wi‑Fi network if you’re using iCloud or Quick Start.
- Have your Apple ID email, password, and two-factor authentication method ready.
- If you use a lot of photos and videos, consider a compressed backup or a local transfer to avoid bandwidth bottlenecks.
Phone Tips Pro’s insights emphasize that preparation saves time and reduces the risk of data gaps. A well-prepared start also makes it easier to verify data after the transfer completes. Keep this in mind as you move through the steps.
Choosing your transfer method
There are three primary ways to move data from one iPhone to another: Quick Start over Bluetooth/Wi‑Fi, restoring from an iCloud backup, and restoring from a local Finder (macOS) or iTunes (Windows) backup. Quick Start is often the fastest for a clean device-to-device transfer, but iCloud backups are convenient if you want to migrate without cables or if one device isn’t readily reachable. Finder/iTunes backup is ideal when you want a snapshot of your entire device on a computer, with a reliable, offline copy. Each method has trade-offs in speed, data granularity, and setup requirements. If you’re unsure which path to take, start with Quick Start for a quick baseline, then switch to a backup approach if you need to move more complex app data or passwords.
- Quick Start benefits: speed, seamless setup, and automatic data mapping.
- iCloud backup benefits: hands-free, cable-free, good for large data like photos when Wi‑Fi is strong.
- Finder/iTunes benefits: complete offline backup, handy on macOS 10.15+ or Windows with iTunes.
Phone Tips Pro notes that most users complete the process in under an hour for typical data sets, but larger libraries can take longer depending on network speed and device hardware.
Quick Start: a fast, direct transfer
Quick Start uses Bluetooth and Wi‑Fi to transfer data directly from the old iPhone to the new one. On the receiving iPhone, you’ll be prompted to start setup, then you’ll scan the animation shown on the old device. The two devices then negotiate the data to bring over, transferring most user data and settings automatically. This is typically the fastest option when both devices are nearby and on compatible iOS versions. If you’re replacing your phone and want minimal setup, Quick Start is usually your best bet.
- Keep both devices close together during setup.
- Ensure both devices are on iOS 16+ for best compatibility.
- Use a strong Wi‑Fi network or place the devices near a trusted router to speed up the transfer.
Pro tips from Phone Tips Pro: disable feature restrictions on the old device (like Screen Time limits) if they might block the transfer. Also consider temporarily turning off two-factor prompts that could interrupt the flow.
Restoring from an iCloud backup
If you prefer to migrate via iCloud, first back up your old iPhone to iCloud, then sign in on the new device and choose Restore from iCloud Backup during the setup flow. This option is cable-free and excellent if you have a reliable internet connection. The caveat is that you’ll need sufficient iCloud storage for your data, and the time to restore will depend on your backup size and network speed. After restoration, you’ll still complete some setup steps on the new iPhone, such as configuring Face ID and verifying account credentials.
- Verify you have enough iCloud storage (consider upgrading temporarily).
- Use a fast, stable Wi‑Fi connection to speed the restore.
- Be prepared to re-enter some passwords and re-authenticate apps after the transfer.
Phone Tips Pro cautions that some apps may require you to re-login or reauthorize access after the transfer, especially finance and password managers.
Transferring from a Finder/iTunes backup
Mac users can create a Finder backup on macOS Catalina and later, while Windows users can use iTunes to back up the old iPhone. To migrate data, connect the old iPhone to your computer, create a backup (encrypted backups preserve Health data and passwords), then connect the new iPhone and choose Restore from this backup. This method provides a local, offline copy of your data, which can be more reliable in slow networks. It’s particularly helpful if you have extensive data, large photo libraries, or if you want to ensure a consistent restore of app data.
- Create an encrypted backup to preserve health data and passwords.
- Use a wired connection to minimize drift during the restore.
- After restore, you may need to sign back into some apps.
Data that typically transfers (and what may stay behind)
Most personal data—contacts, calendars, messages, photos, and app data—transfers with the chosen method. Health data and saved passwords are preserved if you enable iCloud Keychain or encrypt local backups. Some third-party apps may require reauthorization or may not transfer saved data perfectly due to server-side restrictions or licensing. Photos and videos usually migrate, but if you have local media on apps or offline caches, you may want to perform a secondary backup to ensure nothing gets missed. Review settings like wallpaper, Home Screen layout, and notification preferences after the migration and adjust as needed.
Phone Tips Pro notes that optimizing for speed means pre-placing apps you use most on the Home Screen and keeping a recent backup in place before migration.
Final checks and onboarding on the new iPhone
After the transfer completes, go through each data category to verify everything is present and accurate. Sign in to your Apple ID and re-enable iCloud services such as Photos, Messages in iCloud, and Backup. Set up Face ID or Touch ID, reconfigure wallets and Apple Pay, and review privacy settings. Don’t forget to re-enable Find My iPhone and adjust screen time or accessibility settings if necessary. Finally, run a quick test by sending a test text message, opening a few apps, and checking that your most recent photos appear in the Photos app. This last mile ensures there are no surprises once you start using the device.
- Verify essential apps open and data loads correctly.
- Re-authenticate any accounts that require it.
- Confirm Find My iPhone is enabled for security.
Phone Tips Pro emphasizes a final round of checks to prevent surprises—this is a common area where users overlook a step and then wonder why something didn’t migrate as expected.
Troubleshooting common issues during transfer
No migration is completely frictionless, and occasional issues arise. If the transfer stalls, pause and restart the process. Confirm both devices have adequate battery life or are plugged in, and check that both devices remain within range if using Quick Start. If data seems missing, consider starting a fresh backup of the old iPhone and retrying the transfer. For iCloud-based transfers, ensure you have enough storage and a stable connection. If the receiving iPhone boots into Setup Assist or asks for credentials repeatedly, follow on-screen prompts to complete the setup and sign in again. For prolonged timeouts, a cable-based transfer can offer more consistent throughput.
- Keep devices charged during the entire process.
- Use a wired connection if wireless transfer fails or is slow.
- Revisit Apple ID and password requirements to avoid login prompts mid-transfer.
Phone Tips Pro’s guidance here: if you encounter repeated failures, contact Apple Support or schedule a service appointment to rule out device-level issues or account problems.
What to do with the old iPhone after a successful transfer
Once you’ve confirmed the new device reliably mirrors your data, you can decide whether to erase all content on the old iPhone. If you plan to sell or give away the old device, sign out of iCloud, disable Find My iPhone, and erase all content and settings. If you’re keeping the old device as a backup, you can keep it as-is with the latest backup. After erasing, restore the old device to factory settings if you plan to reuse it in the future. Always ensure your data has a current backup before performing a factory reset on the old device.
- Sign out of iCloud and Apple ID on the old device if giving away.
- Erase all content and settings only after confirming the new device is fully functional.
- Keep the old device as a backup only if you have a current backup on iCloud or Finder.
The Phone Tips Pro team recommends securing your data before handing over or repurposing devices to protect privacy.
Tools & Materials
- Old iPhone(Fully charged; running iOS 16+ ideally)
- New iPhone(Ready to receive data; updated to latest iOS)
- Apple ID credentials(Email and password; two-factor authentication ready)
- Stable Wi‑Fi network(5 GHz preferred; strong signal)
- Lightning to USB-C or USB-C to USB-C cable(Required for wired transfer on some setups)
- Mac or PC with Finder/iTunes(Needed for backup-then-restore path)
- Encrypted local backup option(Needed for Finder/iTunes route)
Steps
Estimated time: 45-120 minutes
- 1
Prepare devices
Charge both iPhones, update to the latest iOS, and sign into the Apple ID on both devices. Confirm you have a strong Wi‑Fi connection or a suitable cable for a wired transfer. Why: starting with fresh software reduces compatibility issues and ensures a smooth migration.
Tip: Charge both devices at least halfway before starting. - 2
Choose a transfer method
Decide between Quick Start, iCloud restore, or Finder/iTunes restore. Quick Start is fastest for direct migration, while iCloud or Finder backups are better when devices aren’t both present or when data sizes are large. Why: selecting the right method reduces setup friction later.
Tip: If you’re unsure, start with Quick Start and switch if needed. - 3
Initiate Quick Start (optional)
Bring the old and new iPhones close, and follow the on-screen prompts on the new iPhone to scan the animation from the old device. Why: this creates a secure, direct channel for data transfer and minimizes missing items.
Tip: Keep both devices near you and avoid waking the old iPhone during the transfer. - 4
Prepare iCloud backup (optional)
On the old iPhone, go to Settings > [Your name] > iCloud > iCloud Backup and create a fresh backup. Why: ensures you have a recent offline copy in case the direct transfer pauses.
Tip: Use encrypted backups to preserve health data and passwords. - 5
Restore from iCloud or Finder backup
On the new iPhone, sign in with your Apple ID and choose Restore from iCloud Backup or Restore from Mac/PC backup. Why: restores a complete dataset including app data and settings when Quick Start isn’t used.
Tip: Be prepared for a several-minute restoration on slower networks. - 6
Verify data transfer and settings
After restoration, check contacts, messages, photos, and apps. Sign back into apps that require authentication. Why: not all data types migrate identically, and some passwords may need re-entry.
Tip: Test Messages, Photos, and a sample app to confirm success. - 7
Finalize setup on the new device
Set up Face ID/Touch ID, re-enable Find My iPhone, and adjust notification preferences. Why: completing these steps ensures security and a smooth daily workflow.
Tip: Tidy Home Screen and reconfigure widgets for quick access. - 8
Post-migration cleanup
If you plan to erase the old device, do so only after confirming the new device is fully functional. Why: this protects against accidental data loss.
Tip: Back up the old device again before erasing content. - 9
If things go wrong
If the transfer stalls or data is missing, retry with a wired connection or re-create a fresh backup before attempting again. Why: interruptions can cause incomplete migrations, so a second attempt often resolves issues.
Tip: Restart both devices and try again from the beginning.
FAQ
Can I transfer without Wi-Fi or internet access?
Yes. Quick Start can work with a direct device-to-device connection, or you can use a wired backup restore via Finder/iTunes. However, a wireless option often speeds things up and reduces the risk of interruptions during setup.
Yes. You can transfer directly between devices using a cable, or use a wired backup restore if you don’t have reliable internet.
Will my photos and messages transfer to the new iPhone?
In most cases, photos, messages, contacts, and settings transfer when using Quick Start or a backup restore. If you use iCloud Photos or Messages in iCloud, these items sync across devices automatically after setup.
Yes—photos and messages usually transfer, and you can ensure they sync automatically with iCloud settings.
Do I need to erase my old iPhone after the transfer?
Only if you plan to give away or sell the old device. Sign out of iCloud, turn off Find My iPhone, and erase all content and settings. If you’re keeping it as a backup, you can leave it as-is with a recent backup.
Only erase if you’re parting with the device; otherwise you can keep it as a backup with a current backup.
What if the transfer gets stuck or fails?
If a transfer stalls, pause, reconnect, and retry. Check battery levels, signal strength, and consider trying a wired transfer. If issues persist, create a fresh backup on the old device and start over.
If it stalls, pause, reconnect, and retry. If needed, backup again and restart the transfer.
Why do some apps require re-login after transfer?
Some apps store credentials locally and require re-authentication for security. For apps with sensitive data, you’ll typically be asked to sign in again or reauthorize access after the migration.
Many apps will ask you to sign in again or reauthorize access after moving to the new iPhone.
How long does a typical transfer take?
Time varies based on data size and method. Quick Start is usually fastest for smaller data sets, while large backups over iCloud or Finder can take longer, especially on slower networks.
Typical transfers take from a few minutes to an hour or more, depending on data size and method.
Watch Video
Quick Summary
- Start with a prepared, charged device setup
- Choose the transfer method that matches your situation
- Verify data after migration and re-authenticate apps
- Enable Find My iPhone and security features on the new device
- Have a backup handy in case you need to retry
- If something fails, switch to a wired backup path for reliability