How to get Quick Start on iPhone: Fast setup guide
Master Quick Start on iPhone to transfer data quickly from an existing iPhone during setup. This practical guide covers prerequisites, step-by-step transfer, troubleshooting, and security tips for a smooth, productive start in 2026.

Quick Start on iPhone lets you transfer data from an existing iPhone to a new device during setup by bringing the two devices close together and following on-screen prompts. You’ll sign in with your Apple ID and choose what to transfer, after which the new iPhone completes setup with your apps and settings. For best results, keep both devices powered, nearby, and connected.
What Quick Start is and when to use it
Quick Start is Apple's guided setup workflow designed to accelerate getting a new iPhone up and running. By establishing a direct data transfer from your current iPhone to a new device, it copies over essential apps, settings, accounts, and content so you can begin using the new device sooner. The Phone Tips Pro team emphasizes that this feature shines when upgrading to a newer model or replacing a damaged device, because it minimizes manual reconfiguration. You still review and customize settings after the transfer, but the heavy lifting happens automatically, saving you time and ensuring consistency across devices. In short, if you want a smooth handoff from old to new, Quick Start is your fastest path forward.
- It supports data like apps, accounts, wallpaper, and preferences.
- You can opt for a wireless transfer or a wired option if you prefer a physical link.
- Your Apple ID and iCloud status influence what can be migrated automatically.
Phone Tips Pro observations suggest starting with Quick Start on a fresh device and then finishing setup with personal tweaks.
Prerequisites and compatibility
Before you begin, make sure both iPhones are capable of Quick Start and meet a few practical requirements. You’ll need an old iPhone with your data and a new iPhone ready to receive it. Both devices should be charged or plugged in to avoid interruptions. Keep Bluetooth enabled on both devices and ensure they are within close proximity (usually a couple of inches to a few feet). You’ll also want a reliable Wi‑Fi connection and access to your Apple ID credentials for signing in. If you use two-factor authentication, have your verification method handy. Although not strictly required, having updated iOS versions on both devices helps ensure a smoother transfer. Finally, keep any sensitive data backed up in case you want to fall back to a manual restore.
- Have your Apple ID handy and ensure it’s active.
- Use a stable power source or ensure both devices have battery life above ~50% before starting.
- If you encounter any prompts, follow them closely rather than skipping steps.
How Quick Start transfers data and what you can move
During setup, Quick Start creates a secure link between the two iPhones and begins migrating your chosen data set. Typical transfers include apps, app data, photos, contacts, messages, settings, and home screen layout. You can customize what to import or omit to tailor the new iPhone to your preferences. If you’re moving from a significantly older iPhone or have a large photo library, plan for a longer transfer time and consider connecting to a strong Wi‑Fi network to speed things up. If wireless isn’t viable, a wired transfer option exists via supported cables and adapters.
- Data you choose to transfer can dramatically affect speed. Import essential items first (contacts, messages, accounts) and add media later if needed.
- The transfer runs in the background while you continue with optional setup steps on the new iPhone.
Common pitfalls and troubleshooting tips
Even with Quick Start, hiccups can happen. If the devices don’t detect each other, recheck that Bluetooth is on, move the devices closer, and ensure both have sufficient battery. If you’re asked to verify a passcode, enter the code shown on the new iPhone on the old one. Some transfers stall with large media libraries; in that case, you can pause and resume or temporarily connect to a strong Wi‑Fi network. If you experience persistent failures, you can opt to restore from an iCloud backup or perform a manual transfer later. Staying patient and following on-screen prompts is usually enough to complete the process.
- Keep both devices within a few inches of each other during the transfer.
- Do not interrupt the process once it begins unless you must; pausing may extend total time.
After-transfer: recommended checks and tweaks
Once the transfer completes, walk through essential checks to ensure everything migrated correctly. Open key apps to confirm login status and data integrity. Verify iCloud settings, Photos, Messages, and Mail accounts. Re-enable any services that require sign-in, such as Find My iPhone and iCloud Keychain, and review privacy settings to ensure they reflect your preferences. Customize the Home Screen and re-download any apps that didn’t migrate with complete data. This stage is your opportunity to tidy up and tailor the new device for immediate use.
- Sign in to iCloud and verify that important data arrives as expected.
- Review app permissions and privacy settings for peace of mind.
- Reorganize the Home Screen to mirror your prior layout or create a fresh arrangement.
Phone Tips Pro notes that a quick post-transfer audit pays off, saving time later when you rely on essential apps.
Privacy and security considerations
During Quick Start, your data is transmitted between devices via a temporary connection and may be stored briefly on the new device while migrating. To protect your privacy, ensure you’re on a trusted network and avoid starting the transfer on public Wi‑Fi if possible. After the transfer, review permissions granted to apps and services, and adjust settings like Location Services, Analytics sharing, and advertising preferences to align with your privacy goals. If you’re upgrading to a shared device, consider enabling Screen Time restrictions and enabling two-factor authentication for added security.
- Remove any sensitive data you don’t want migrated beforehand.
- Enable strong passcodes and biometric security on the new iPhone.
- Regularly review app permissions to maintain privacy post-migration.
Authoritative sources
For further reading and official guidance, refer to these sources:
- https://support.apple.com/guide/iphone
- https://www.imore.com/how-to-use-quick-start-iphone
- https://www.theverge.com/tech
Tools & Materials
- Old iPhone with data to transfer(Unlocked and charged; at least 50% battery recommended)
- New iPhone to receive data(Power on and ready for setup)
- Stable Wi‑Fi network(Needed for verification and optional iCloud transfer)
- Apple ID credentials(Email and password for signing in)
- Cable or adapters (optional)(If you prefer wired transfer or traditional restore)
- Bluetooth enabled on both devices(Required for device discovery during Quick Start)
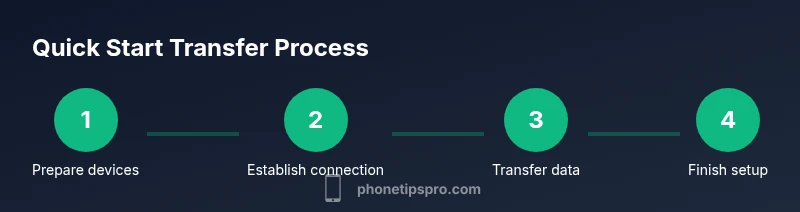
Steps
Estimated time: Estimated total time: 25-40 minutes
- 1
Power on both iPhones
Turn on the old iPhone and the new iPhone. Make sure they’re charged and ready for setup. Having both devices awake prevents prompts from failing to appear later.
Tip: Keep both devices in the same room and near you to ensure a strong connection. - 2
Bring devices close together
Hold the iPhones near each other so the proximity prompt can appear on the new device. The Quick Start screen should detect the nearby iPhone and present setup options.
Tip: Avoid moving devices during the transfer to prevent dropouts. - 3
Tap Quick Start on the new iPhone
On the new iPhone, choose the Quick Start option when prompted. This initiates a direct data transfer from the old device. Follow on-screen instructions to configure your preferred transfer options.
Tip: If the prompt doesn’t appear, ensure Bluetooth is enabled and both devices are updated. - 4
Authenticate with Apple ID
Sign in with your Apple ID on the new device and authorize access to iCloud and other services. This step unlocks features that require your account data, like Messages and iCloud backups.
Tip: Have your Apple ID password handy and verify two-factor prompts if prompted. - 5
Choose what to transfer
Select the data you want to migrate, such as contacts, photos, apps, and settings. You can tailor the transfer scope to balance speed with completeness.
Tip: Start with essential items first, then add media later if needed. - 6
Wait for the transfer to complete
Let the process finish without interrupting. Large libraries may take longer; you’ll see a progress indicator on the screen.
Tip: Keep devices plugged in or well charged and avoid starting other heavy tasks during transfer. - 7
Finish setup on the new iPhone
Proceed with remaining setup steps on the new device, such as confirming settings, enabling features, and signing back into apps as needed. Check essential apps to confirm data integrity.
Tip: Test messages, emails, and key apps to ensure everything migrated correctly. - 8
Customize and verify after transfer
Review Home Screen layout, re-download apps as needed, and adjust privacy settings. Ensure services like Find My iPhone and iCloud are configured as desired.
Tip: Take a few minutes to tune settings for a smoother daily experience.
FAQ
What is Quick Start and when should I use it?
Quick Start is a built-in setup flow that transfers data from your old iPhone to a new one during initial setup. Use it when upgrading or replacing a device to minimize manual configuration and speed up getting started.
Quick Start transfers your data from your old iPhone to a new one during setup, helping you start quickly after upgrading.
Do I need Wi‑Fi for Quick Start?
Some parts of the transfer can use a direct link between devices, but a stable Wi‑Fi network helps for verification and optional backups. While you can proceed with a direct device-to-device transfer, having Wi‑Fi improves reliability.
A stable Wi‑Fi network helps, but the direct device-to-device transfer can work without it in many cases.
Can I transfer data from Android to iPhone with Quick Start?
Quick Start is designed for iPhone-to-iPhone transfers. Android-to-iPhone migration requires different methods, such as using Move to iOS or manual transfer steps.
Quick Start works best when both devices are iPhones; Android-to-iPhone transfers use other options.
What should I do if Quick Start doesn’t detect the old iPhone?
Make sure Bluetooth is on on both devices, keep them close, and ensure both devices are updated. Restarting both devices can also help resolve detection issues.
If Quick Start isn’t detecting the old iPhone, check Bluetooth, proximity, and try restarting both devices.
How long does a typical Quick Start transfer take?
Time varies with the amount of data being moved. Small transfers finish quickly, while large libraries can take longer. Plan for 20–40 minutes or more for substantial migrations.
Transfer time depends on your data size; expect 20 to 40 minutes for most cases.
What should I check after the transfer finishes?
Open essential apps, verify accounts, and confirm all critical data arrived. Re-enable any services that require sign-in, and adjust privacy settings as needed.
After transfer, verify apps and accounts, then re-enable services and adjust privacy settings.
Watch Video
Quick Summary
- Use Quick Start for the fastest path to setup a new iPhone.
- Prepare both devices and follow prompts without interruption.
- Customize data transfer to balance speed and completeness.
- Verify data integrity and adjust privacy/security settings after transfer.