How to Transfer Data to a New iPhone: A Complete Guide
Learn how to transfer data to a new iPhone using Quick Start, iCloud, Finder, or Move to iPhone from Android. This educational guide covers prep, methods, troubleshooting, and security tips.

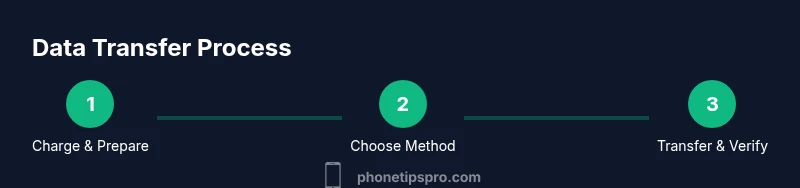
With a new iPhone, you can transfer your data using Quick Start, iCloud backup restore, Finder/iTunes backup, or Move to iPhone from Android. Start by charging both devices, connecting to a stable Wi‑Fi, and signing into your Apple ID. According to Phone Tips Pro, choose the method that matches your data size and privacy needs for a smooth setup.
Overview of Transfer Methods
When upgrading to a new iPhone, you have multiple paths to move your data. The four most common options are Quick Start (direct device-to-device transfer), restoring from an iCloud backup, restoring from a Finder/iTunes backup on a computer, and Move to iPhone for Android users. Each method covers most data types—apps, settings, messages, and photos—though some sensitive items (like certain app data or passwords) may require re-authentication. Phone Tips Pro notes that the best choice depends on data size, Wi‑Fi reliability, and your privacy preferences. Quick Start shines when both devices are near each other and you want a fast, wireless handoff. Restoring from a backup is ideal when you want to pause and verify the process or when you’re migrating from an older device with a large data footprint. Android-to-iPhone transfers are supported via Move to iPhone and work best for a fresh start with essential items.
Prerequisites and Prep Work
Before you begin, ensure both devices are charged or connected to power. Update both iPhones to the latest iOS version to minimize compatibility problems during transfer. Sign into your Apple ID on both devices to ensure iCloud, iMessage, and app data link properly on the new phone. If you plan to use iCloud backups, confirm you have enough iCloud storage or upgrade temporarily for the transfer. A stable Wi‑Fi connection is essential for cloud-based transfers, while a computer with Finder or iTunes is required for local backups. Gather credentials like your Apple ID password and any two-factor prompts you may encounter. Decide in advance which data types you want to move first, and be ready to re-authenticate into services after the transfer (banks, email, etc.).
Quick Start: Direct Device-to-Device Transfer
Direct device-to-device transfer via Quick Start is the fastest path when you want a seamless handoff. Turn on the new iPhone and place it near the old one. A setup screen will appear on the old iPhone offering to transfer data directly. Follow the on-screen prompts to authenticate with your Apple ID and choose which data to move. The transfer duration varies with data size and network speed, typically ranging from a few minutes to over an hour.
Keep both devices close and plugged in during the transfer to avoid interruptions. After the transfer finishes, complete the setup on the new iPhone and verify that photos, messages, apps, and settings have arrived. Some passwords may require you to re-enter credentials for banking apps or private accounts. If you can, perform the transfer over a reliable Wi‑Fi network to prevent data loss due to connection drops.
Restoring from iCloud Backup
If you prefer wireless convenience, restoring from an iCloud backup is a solid choice. On your old iPhone, go to Settings > [your name] > iCloud > iCloud Backup > Back Up Now. On the new iPhone, during setup choose Restore from iCloud Backup, sign in with your Apple ID, and select the most recent backup. The restoration transfers most data—apps, settings, messages, photos, and accounts—though some in-app data or downloaded content may require re-download. The time depends on network speed and backup size. Ensure you have enough iCloud storage before starting. If you use two-factor authentication, be ready to re-enter verification codes. After restoration, you may need to re-enter passwords for several apps, but the structure and layout of your old device will be preserved.
Restoring from Finder / iTunes Backup
Backing up to Finder (macOS Catalina and later) or iTunes (Windows or macOS prior to Catalina) creates a local, encrypted copy of your iPhone. On the new iPhone, select Restore from Mac or PC during setup, then choose the most recent backup and start the restoration. This method is reliable for large data sets and works well when your internet connection is slow or limited. If you encrypted the backup, you’ll need the password to restore. The process can take longer than cloud-based methods but yields a faithful replica of your old device, including apps, messages, and settings. After the restore completes, sign back into apps as needed and confirm that all essential data is present.
Android to iPhone: Move to iPhone Steps
To move data from an Android device, use the Move to iPhone app during the setup of the new iPhone. Connect the Android device to the iPhone’s temporary Wi‑Fi network created for the transfer, then follow prompts to select items to move. Typical transfers include Contacts, Message history, Photos, and Videos; some app data may not migrate. After the transfer completes, finish configuring your new iPhone and sign into accounts. Large transfers may take longer, so keep both devices plugged in. This option is ideal for users switching from Android to iPhone and who want to minimize manual data entry.
If you encounter issues, restart both devices and retry, ensuring proximity and power. If the Android-to-iPhone method seems slow or incomplete, consider an alternate approach (cloud backup or local backup) to finalize the data move.
Handling Photos, Messages, and Passwords
Photos and videos typically transfer with the rest of your data, but large libraries can take longer to appear on the new device. Messages migrate, including iMessage chats, but some third-party messaging apps use their own cloud services and may require separate sign‑ins. Password management is important: you’ll often be prompted to re‑enter passwords for apps and websites after the transfer. Enabling iCloud Keychain or a dedicated password manager helps ensure a smooth login experience. If you rely on encrypted data for certain apps or services, consider rechecking app permissions and re-authenticating accounts after setup. Keeping your devices updated minimizes compatibility issues with future iOS releases.
Common Pitfalls and Troubleshooting
Not enough iCloud storage can stall a cloud-based transfer; if needed, upgrade storage or switch to a local backup instead. A transfer can stall if devices lose power or disconnect from Wi‑Fi; try pausing and restarting, keeping both devices near the router. Data missing after transfer can happen if you choose the wrong backup or skip steps; double-check which backup you used and consider retrying with a different method. App re-authentication is common after migration; have passwords ready or enable a password manager to streamline sign‑ins. Android-to-iPhone transfers may fail due to incompatible apps or network restrictions; in those cases, complete critical data transfer via iCloud or Finder first, then reinstall apps manually. If problems persist, consult Apple Support or refer to How-To Geek and Macworld guides for troubleshooting steps.
Privacy, Security, and Post-Transfer Tips
Data in transit is protected by encryption in transit and at rest, and iCloud backups are protected by end-to-end encryption where supported. After transferring, review privacy settings, adjust app permissions, and enable Find My iPhone for security. Use two-factor authentication on your Apple ID and consider enabling iCloud Keychain to securely store passwords. If you’re disposing of or selling your old device, erase all content and settings to remove personal data. Keep your devices updated, use a trusted Wi‑Fi network during transfers, and avoid completing sensitive transactions until you’ve verified the new device’s data integrity. The goal is a smooth transition with minimal post-transfer friction.
Authority sources
For additional guidance, refer to trusted external sources that explain iPhone data transfer workflows:
- Apple Support: Move data to your new iPhone — https://support.apple.com/en-us/guide/iphone/iphc5d5d0b
- How-To Geek: How to transfer data from an iPhone to a new iPhone — https://www.howtogeek.com/399776/how-to-transfer-data-from-an-iphone-to-a-new-iphone/
- Macworld: How to transfer data from iPhone to iPhone — https://www.macworld.com/article/671913/how-to-transfer-data-from-iphone-to-iphone.html
Tools & Materials
- Two iPhones (old and new)(Source device with data; target device to receive data)
- Stable power source for both devices(Keep devices charged during transfer to avoid interruptions)
- Stable Wi‑Fi network or computer with Finder/iTunes(Internet access for cloud transfers or local backups)
- Apple ID credentials(Needed to sign in and authorize data transfer)
- Backup plan (iCloud or Finder/iTunes)(Use if you prefer not to do direct device transfer)
- Cables/adapters (optional)(Lightning-to-USB-C or USB-C to USB-C for wired transfers when supported)
Steps
Estimated time: 60-120 minutes
- 1
Charge both iPhones
Plug both devices into a power source so they don’t run out of battery mid-transfer. This helps prevent data corruption or interruptions and ensures a smooth setup after the move.
Tip: Keep devices near a power outlet and avoid high-traffic USB hubs. - 2
Back up the old iPhone
Create a current backup of your old device either to iCloud or computer (Finder/iTunes). A fresh backup ensures you don’t miss recent messages, photos, or app data.
Tip: If using iCloud, check that the backup completed successfully before continuing. - 3
Choose your transfer method on the new iPhone
During setup, decide between Quick Start, iCloud Restore, Finder/iTunes Restore, or Move to iPhone from Android. Each method has its own prerequisites and data types that transfer.
Tip: If privacy is a priority, prefer iCloud Restore or Finder backup for explicit control over what is moved. - 4
Start Quick Start on the direct transfer
If you chose Quick Start, place the devices side by side and follow prompts to pair them. Sign in with your Apple ID and select data to move.
Tip: Keep both devices close and do not interrupt the wireless handshake. - 5
Restore from iCloud Backup
If using iCloud, sign into your Apple ID on the new device and choose Restore from iCloud Backup. Pick the most recent backup and wait for apps and data to download.
Tip: Ensure your Wi-Fi is stable and avoid starting other data-heavy tasks during restore. - 6
Restore from Finder/iTunes Backup
If you backed up to a computer, connect the new iPhone and begin Restore from Mac/PC. Enter your encryption password if prompted and select the latest backup.
Tip: Encrypted backups preserve more data, including sensitive settings. - 7
Move data from Android (if applicable)
If you’re switching from Android, use Move to iPhone during setup to migrate contacts, messages, photos, and more. Some app data may not transfer.
Tip: Complete key logins after setup to avoid delays with messaging apps. - 8
Verify data and sign back into services
After the transfer completes, verify that photos, messages, and apps appear as expected. Sign back into accounts and enable essential settings (iCloud Keychain, Find My iPhone).
Tip: Keep an extra watch on apps requiring re-authentication such as banking apps. - 9
Complete post-transfer cleanup
Delete any temporary files if needed and ensure privacy settings are correct. Remove old device if you’re planning to retire it.
Tip: Run a quick privacy check to revoke access for apps you no longer use.
FAQ
What data can be transferred to a new iPhone?
Most core data transfers during iPhone migration include apps, settings, messages, photos, and contacts. Some app-specific data or passwords may need re-authentication after the transfer.
Most core data transfers over iPhone migration include apps, settings, messages, photos, and contacts; some app data or passwords may require re-authentication.
Do I need an internet connection to transfer data?
Cloud-based transfers like Quick Start with iCloud require an internet connection. If you use Finder or iTunes backups, you can transfer data without internet by restoring from a local backup.
Cloud-based transfers use the internet, while local backups via Finder or iTunes don’t require internet access.
How long does a typical transfer take?
Duration depends on data size and network speed. Smaller data sets finish quickly, while large photo libraries or complex app data may take longer.
Transfer time varies with data size and network speed; expect longer durations for large photo libraries.
Can I transfer data from Android to iPhone?
Yes. Use Move to iPhone during the new iPhone setup to migrate contacts, messages, photos, and more. Some data may not migrate depending on the app or service.
Yes — use Move to iPhone during setup to transfer key items; some app data may not migrate.
What should I do if the transfer gets stuck?
Pause and restart the transfer, ensure devices stay powered and close to the router, and retry with a stable connection. If problems persist, try a different method (cloud backup or local backup) or contact Apple Support.
If a transfer stalls, restart with stable power and connection; try another method or contact support if needed.
Will I lose anything if I reset my new iPhone during setup?
Resetting during setup will interrupt the transfer. It’s best to complete the process in one pass or pause and resume from the start process.
Resetting during setup can interrupt transfer; complete the process, or resume from the start.
Watch Video
Quick Summary
- Back up before you start to avoid data loss
- Choose a transfer method that matches your data size and network
- Verify data on the new iPhone before proceeding
- Re-authenticate apps and services after the move
- Enable Find My iPhone and iCloud Keychain for ongoing protection