How to Know If Your iPhone Is Already Repaired
Learn how to verify if your iPhone has already been repaired with practical checks, tests, and safety tips from Phone Tips Pro. Includes battery health, screen integrity, and data safety guidance.

According to Phone Tips Pro, to know if your iPhone is already repaired, start with a professional diagnostic and a careful functional check. Inspect display quality, battery health, cameras, speakers, and wireless features. Verify repair receipts or service notes, test all buttons, and run a reset. When tests pass and documentation matches, the device is likely repaired.
Visual and Documentation Verification
A solid first step after any repair is to confirm the paperwork and visual evidence. Start by locating the repair receipt or service notes from the technician or authorized service provider. Compare the listed parts and service dates with what Apple’s system shows for the device. Look for signs of non-original parts only as a last resort and note any discrepancies. If the shop provides originality stamps or a serial-number tag, verify it against the iPhone’s serial number. This step helps establish provenance and reduces post-repair disputes. According to Phone Tips Pro, documentation is your best defense when assessing repair legitimacy and long-term reliability.
Quick Verification Checklist
- Repair receipt with parts listed and date of service
- Serial number matches device records
- Service notes describing the exact fix performed
- Visual indicators of original screens or components
- Clear warranty or labor terms
- Photos before/after where available
Tools & Materials
- Repair receipt or service notes(Documentation from an authorized tech or repair shop)
- iPhone and original charger(Charger helps test charging behavior and battery response)
- Clean microfiber cloth(For screen inspection and fingerprint-free surfaces)
- Good lighting and a magnifying glass (optional)(To inspect seals, screws, or tiny parts)
- Quiet environment for camera/mic tests(To accurately assess audio during calls and recordings)
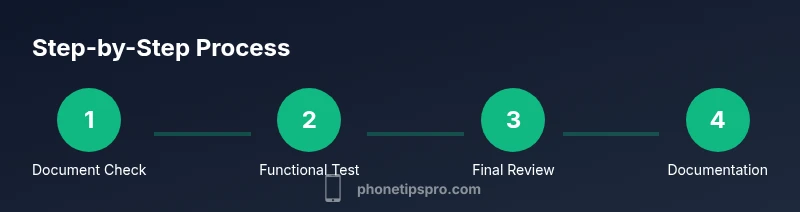
Steps
Estimated time: 30-60 minutes
- 1
Verify repair paperwork
Collect the repair receipt and any service notes. Check the parts listed against what was actually replaced and confirm dates match. This establishes traceability and reduces ambiguity about what was done.
Tip: If there’s no receipt, contact the shop for a written summary before testing. - 2
Inspect physical integrity
Look for gaps, seal integrity, and button alignment. A misaligned home button or loose screen can indicate post-repair issues even if the unit powers on.
Tip: Use a bright light to reveal gaps around the display edges. - 3
Power on and test core functions
Boot the device and confirm it starts normally without boot loops. Test power button response, volume controls, and silent/ring switches.
Tip: Note if there’s lag between button press and action, which could signal a loose cable. - 4
Test the display and touch panel
Swipe across all edges to check for dead zones, unresponsive areas, and color uniformity. Tilt the device to observe color shifts that might indicate panel miscalibration.
Tip: Hold the device at multiple angles to reveal glossy reflections indicative of adhesive gaps. - 5
Evaluate battery health and charging
Open Settings > Battery to view health metrics and performance. Use a charger to verify steady charging without overheating or abnormal cycling.
Tip: If battery health shows a severe decline, request a replacement with documentation. - 6
Test cameras, speakers, and microphones
Capture photos in different lighting, record a short video, and run a voice memo to assess mic clarity and speaker output.
Tip: Check video stabilization and autofocus performance under varied lighting. - 7
Check sensors and Face ID/Touch ID
Test proximity sensor, ambient light sensor, and biometric authentication. Ensure Face ID/Touch ID unlocks quickly and securely.
Tip: If biometrics fail, re-run enrollment or reset biometric data as advised by the service provider. - 8
Test connectivity features
Make a cellular call, toggle Wi‑Fi, Bluetooth, and GPS. Verify Bluetooth peripheral pairing and location services accuracy.
Tip: Perform a speed test to assess data throughput stability post-repair. - 9
Software sanity checks
Confirm iOS version matches expectations, check that apps open normally, and run a hard reset to ensure no software hiccups persist after repair.
Tip: Back up data before any reset when possible. - 10
Document results and next steps
Record test outcomes, note any anomalies, and store receipts. If issues arise, contact the repair shop promptly with your findings.
Tip: Take timestamps and photos during testing to support your report.
FAQ
How can I tell if a screen replacement was done correctly?
Look for uniform brightness and color, consistent edge alignment, and no touch responsiveness issues across the entire display. If you notice dead pixels, misalignment, or touch lag, the repair may not be complete. Compare with the original unit’s specs if possible.
Check for uniform brightness and edge alignment, and ensure touch works across the entire screen.
What if the battery drains fast after repair?
Fast drainage after repair can indicate battery or calibration issues. Check battery health in Settings > Battery, reset settings if needed, and test with a full charge cycle. If concerns persist, request a battery health reassessment from the technician.
If the battery drains quickly after repair, have the battery health checked and ask for reassessment if needed.
Can non-official parts be used in a repair?
Non-official parts may be cheaper but can affect performance and durability. Request a parts list and verify authenticity with the service provider. If possible, prefer original or Apple-certified components.
Non-official parts can affect performance; ask for part verification and prefer authentic components.
Is a receipt necessary to prove repair for warranty?
A repair receipt or service note is often required to validate warranty coverage for post-repair issues. Keep documentation safe and accessible for future claims.
Keep the repair receipt; it helps prove eligibility for future warranty claims.
Will a factory reset erase the repair evidence?
A factory reset can erase personal data but should not erase repair records from the service provider’s file. Back up data before resetting, and confirm with the shop that repair logs remain intact.
A reset may erase data but not the repair record from the service provider; back up before resetting.
Do repairs affect the iPhone warranty?
Repairs can affect warranty status depending on the service provider and whether Apple-certified parts were used. Review the warranty terms with the shop and request a written warranty for the repair.
Repair terms can affect warranty; confirm parts used and obtain a written warranty.
Watch Video
Quick Summary
- Verify documentation first to establish repair scope.
- Test core hardware and sensors methodically.
- Document results and preserve receipts for warranties.
- If anything feels off, contact the service provider promptly.