How to Reset an iPhone That is Locked Without a Computer
Learn how to reset a locked iPhone without a computer using Find My iPhone and iCloud. This guide covers prerequisites, activation lock considerations, and restoring data from backups after the reset.

Learn how to reset an iPhone that is locked without a computer by using Find My iPhone from a trusted device or iCloud on another device. This remote erase will remove all data and settings, so ensure you have your Apple ID credentials and a backup if possible before proceeding.
What resetting means when your iPhone is locked
Resetting an iPhone that is locked means erasing all data, settings, and the passcode, returning the device to its factory state. This is often the last resort when you can’t enter the lock screen or when the device is disabled after too many failed attempts. Importantly, a remote reset via Find My iPhone does not require a computer, but it does require access to your Apple ID and an internet connection. According to Phone Tips Pro, this remote erase is the most reliable method when you need to regain access without a PC. After the erase, you can restore from a backup if you have one and you’ll have to set up the iPhone again from scratch. Be aware that Activation Lock may still block setup unless you sign in with the original Apple ID. This approach is particularly helpful for iPhone users who have misplaced their computer or prefer handling security tasks on mobile devices.
For many, the key benefit of a remote erase is speed and simplicity. It avoids the need to boot into recovery mode on a computer and reduces the risk of data corruption during a manual reset. However, it’s critical to understand that the process wipes all personal data, apps, and configurations. If you have a recent iCloud or iTunes backup, you can restore much of your information after the reset. If activation lock is enabled, you will be prompted for the Apple ID credentials to re-activate the device. With that in mind, prepare your Apple ID before starting and confirm that Find My iPhone is active on the device in question.
Why you might need to reset without a computer
Many users face situations where a password is forgotten, the device is disabled after multiple failed attempts, or a company-managed iPhone needs a new setup. In these cases, the ability to reset without a computer offers a safeguard that keeps the device usable without access to a PC. The method relies on Apple’s cloud services, not local software, which means a stable internet connection and correct Apple ID credentials are your most important assets. Phone Tips Pro emphasizes that erasing remotely remains the most reliable option when you cannot connect a computer to the iPhone.
Key differences between reset and restore
A reset (erase) returns the device to factory settings, removing all data and settings. A restore uses a backup (iCloud or computer) to reconstruct apps, data, and preferences after the reset. Without a computer, you’re typically performing a reset first, then choosing to restore from a backup during the setup process. Understanding this distinction helps you plan data recovery and reduces the risk of permanent data loss.
Activation Lock: what it is and why it matters
Activation Lock is an anti-theft feature tied to your Apple ID. After a remote erase, the device will ask for the original Apple ID during setup. If you cannot provide the credentials, you won’t be able to complete the activation. This is where preparation is critical: ensure you know your Apple ID and password, or have recovery options ready. Phone Tips Pro notes that activation lock is the single biggest hurdle for forgotten credentials, but it can be resolved with proper ownership proof and Apple support if needed.
Alternatives if Find My iPhone or iCloud isn’t available
If Find My iPhone isn’t enabled or you don’t have access to another device, options are limited and often require in-person assistance. Visiting an Apple Store or contacting Apple Support can help verify ownership and guide you through the appropriate steps. In some cases, you may be asked to provide proof of ownership or a device serial number. While these routes take longer, they protect your data and ensure you follow Apple’s policies.
What you should do after the reset
Once the erase is complete and the device is reset, you’ll be prompted to set up the iPhone as new or restore from a backup. If you have a recent iCloud backup, choose Restore from iCloud during setup to recover contacts, photos, and apps. Re-enable Find My iPhone and Activation Lock protections to prevent future lockouts. This is also a good time to review security settings, enable two-factor authentication, and create a strong passcode.
Step-by-step recap: what to watch for during setup
During setup, watch for prompts about restoring from a backup, signing in with your Apple ID, and enabling iCloud services. If you see Activation Lock prompts, pause and re-enter your Apple ID credentials. If you don’t have backups, you’ll start from a clean slate, so consider setting up your most-used apps and services first to quickly recreate your routine.
Safety and privacy considerations after a reset
A reset wipes data, so ensure you have backups or that you’ve securely logged out of accounts before erasing. After setup, review privacy settings and app permissions. If the device is a shared or enterprise iPhone, confirm that the reset aligns with IT policies before re-enrolling in management systems.
Final checklist before handing the device over
- Confirm Find My iPhone is enabled and you know your Apple ID credentials.
- Ensure you have a recent backup if possible.
- Verify Activation Lock is prepared for re-activation.
- Install essential apps and configure a passcode or biometrics.
- Review security settings and enable two-factor authentication for your Apple ID.
The Phone Tips Pro recommendation for locked iPhones
The Phone Tips Pro team recommends using Find My iPhone for a remote erase when no computer is available. This method minimizes downtime and avoids the risks of attempting hardware-based resets. Always prepare your Apple ID credentials and backup strategy in advance to streamline recovery after the reset.
Tools & Materials
- Apple ID credentials (email and password)(Needed to sign in to Find My iPhone and re-activate the device after reset)
- A second device with internet access (iPhone, iPad, or computer)(Used to access iCloud.com or the Find My app to perform remote erase)
- Access to iCloud.com or the Find My app(You must be able to sign in to iCloud to erase the iPhone remotely)
- Recent backup (iCloud or iTunes backup)(Optional, to restore data after reset)
- Proof of ownership or recovery options(Helpful if Activation Lock prompts arise or if you can't sign in)
Steps
Estimated time: Estimated total time: 45-60 minutes
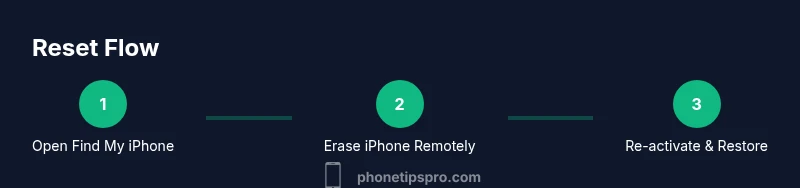
- 1
Confirm prerequisites
Double-check that you have access to your Apple ID and a device with internet. This ensures you can sign in to iCloud and initiate the remote erase. If any prerequisite is missing, pause and resolve it before proceeding.
Tip: Having a backup plan (backup location or recovery options) speeds up later restoration. - 2
Open Find My iPhone on a secondary device
Launch the Find My app on another Apple device or visit iCloud.com from any browser. This is your gateway to remotely erasing the locked iPhone without needing a computer.
Tip: Use a trusted device to reduce the risk of phishing or credential theft. - 3
Sign in securely and locate your device
Sign in with your Apple ID and select your locked iPhone from the list of devices. Ensure the device is online so the erase can commence.
Tip: If you can’t see the device, verify that Find My iPhone is enabled on the target iPhone. - 4
Choose Erase iPhone and confirm
Choose Erase iPhone from the device menu and confirm the action. The remote erase will erase all data and settings on the device.
Tip: This step cannot be undone; make sure backups exist if you need data recovery. - 5
Enter Apple ID credentials to disable Activation Lock after erase
After erasing, you’ll need to sign in again with the same Apple ID to re-activate the device. This ensures the Activation Lock is properly managed.
Tip: Have your Apple ID password ready to avoid setup delays. - 6
Wait for the erase to complete
The device will erase and restart. The duration depends on network speed and device model. Do not interrupt the process.
Tip: Keep the device connected to power if possible during the erase. - 7
Set up iPhone as new or restore from backup
During setup, choose whether to set up as a new device or restore from an iCloud backup. Restoration helps recover key data if backups are available.
Tip: If restoring, ensure you’re signed in with the same Apple ID used for the backup. - 8
Enable Find My iPhone and security features again
After setup, turn on Find My iPhone to protect against future lockouts and consider enabling two-factor authentication for your Apple ID.
Tip: Regularly review account recovery options to avoid being locked out again. - 9
Check Activation Lock status
If Activation Lock prompts appear, sign in with the correct Apple ID credentials to complete setup.
Tip: If you don’t have credentials, contact Apple Support with proof of ownership. - 10
Reinstall essential apps and data
Re-download apps and reconfigure settings to match your usual usage. Prioritize messaging, email, and photography apps.
Tip: Back up formative configurations to simplify future resets. - 11
Verify data after restoration
Check contacts, photos, and documents to confirm data integrity post-restore. If anything is missing, you may recover from other backups.
Tip: If data is missing, explore alternate backups or cloud sync options. - 12
Document key credentials for future use
Note down your Apple ID, password, and recovery options in a secure place. Later, you’ll avoid a similar lockout scenario.
Tip: Use a password manager to securely store credentials.
FAQ
Can I reset a locked iPhone without knowing the Apple ID password?
If Activation Lock is enabled, you must sign in with the original Apple ID credentials. Without them, you won't complete setup after erasing. If you’ve forgotten your password, use Apple’s account recovery options to regain access.
You need the original Apple ID credentials to finish setting up after the reset. If you forgot the password, use Apple’s recovery options to recover access.
What happens to my data when I erase the iPhone remotely?
Erasing the iPhone removes all data and settings. If you have an iCloud backup, you can restore most data during setup. Without a backup, the data cannot be recovered from the device itself.
Erasing wipes everything, but you can restore from a backup if you have one. Otherwise, data is lost from the device.
What if Find My iPhone isn’t available on the device?
Remote erase requires Find My iPhone to be enabled. If it isn’t, you’ll need to contact Apple Support or visit an Apple Store for assistance with ownership verification.
If Find My iPhone isn’t set up, you’ll likely need Apple Support to help verify ownership and reset the device.
Will this erase unbacked photos and messages?
Yes, a remote erase removes all data. If you didn’t back up recently, those photos and messages may be lost unless recovered from another service.
A remote erase wipes everything, so back up often to prevent data loss.
Can I reset an iPhone that is offline?
The erase will occur the next time the device connects to the internet. Ensure the iPhone can access Wi‑Fi or cellular data to complete the reset.
If the device is offline, the erase will run once it reconnects to the internet.
What should I do after the reset to secure the device?
Re-enable Find My iPhone, set a strong passcode or biometric, and enable two-factor authentication for your Apple ID. Verify Activation Lock settings during setup.
After resetting, re-enable Find My iPhone and strong security settings to protect the device.
Watch Video
Quick Summary
- Prepare Apple ID credentials before resetting.
- Use Find My iPhone from another device to erase remotely.
- Activation Lock can block setup; have credentials ready.
- Restore data from backup if available after reset.
- Re-enable security features post-reset.