How to Screen Record on iPhone: Step-by-Step Guide
Learn who you screen record on iPhone, when to use it, and how to enable screen recording safely. This guide covers iOS controls, privacy tips, and practical troubleshooting.

If you're asking who do you screen record on iphone, the answer is that you can record the entire screen with optional microphone audio, then save the clip to Photos. Enable Screen Recording in Control Center, start the recording, and stop when you're done. This built-in feature makes it easy to capture tutorials, bug reports, or demonstrations without extra gear.
Why screen recording on iPhone matters
According to Phone Tips Pro, screen recording on iPhone is a versatile tool for creators, troubleshooters, and everyday users. It lets you capture on-screen actions, app behaviors, and tiny UI details that are hard to describe with words alone. Whether you are making a quick tutorial for colleagues, documenting a bug for support, or sharing a gameplay moment with friends, screen recording keeps the original sequence intact. A key benefit is that you control what gets recorded and for how long, which reduces the back-and-forth when you’re trying to explain a process. For the question embedded in the topic—who do you screen record on iphone—the answer is simple: you can record your own device screen, provided you respect privacy and app restrictions. This capability is part of iOS, designed to be used safely and effectively by most users. As you plan your recording, consider the audience and purpose to tailor length, narration, and highlights.
Understanding who can screen record on iPhone and the limits
Screen recording on iPhone is a built-in feature available to all modern iPhone models running iOS 11 or later. In practice, anyone with an iPhone can start a screen capture to document steps, show settings changes, or share app behavior. However, some apps employ digital rights management (DRM) that blocks recording of their content, such as certain streaming services. This means you might see a black screen or notice that the content cannot be captured while the app is in use. Additionally, when you enable microphone audio, your narration becomes part of the recording, which is great for tutorials but must be managed with privacy in mind. If you’re preparing content for internal use, be mindful of sensitive information that might appear on screen during recording. The Phone Tips Pro team emphasizes planning ahead to ensure your final clip conveys the intended message without exposing private data.
Adding Screen Recording to Control Center: quick setup steps
To access Screen Recording quickly, you should add it to Control Center. Start by opening Settings, then Control Center, and finally Customize Controls. From there, tap the plus sign next to Screen Recording to add it to the included controls. This makes it easy to start a recording with a single swipe and tap, without fumbling through menus. In this section, you’ll also learn how to choose microphone options before you begin, which is essential if you want to narrate your actions or capture ambient sound. By the end of this section, you’ll have a clear path to initiate a recording with confidence and speed.
How to start recording with or without microphone audio
When you’re ready to capture, open Control Center and press and hold the Screen Recording button to reveal options. If you want narration, turn on Microphone Audio. The on-screen countdown begins, giving you a moment to prepare. Start performing the actions you want to record, and monitor the screen for any sensitive information that might appear. If you need to pause, you can stop and resume later, though some workflows prefer a single continuous clip. When you finish, press the red status bar or Control Center again to stop. The clip automatically saves to the Photos app, ready for viewing, editing, and sharing.
Editing and sharing your screen recording on iPhone
After stopping the recording, you’ll find the clip in the Photos app. Here you can trim the beginning or end, add annotations, or apply filters if you want a polished result. If your project requires more advanced edits, you can export to iMovie or another editor for overlays, captions, or transitions. Sharing options include Messages, Email, AirDrop, or cloud storage links. Consider naming conventions and thumbnail choices to make it easy for teammates to identify the clip. This is also a good opportunity to note any disclaimers about the content you recorded, particularly if it includes other people, private information, or app interfaces that may require consent.
Privacy, DRM restrictions, and best practices for screen recording
Privacy should be a core consideration in every screen recording workflow. Avoid capturing sensitive information like passwords, financial details, or personal chats unless you’ve obtained consent and redacted sensitive content. DRM restrictions mean some apps block recording of their content, which is a normal limitation rather than a bug. If you anticipate sharing publicly, ensure you have proper permissions for any content that appears on screen. The best practice is to perform a quick pre-record walkthrough to verify what will appear in the final clip, then adjust your settings—such as turning on Do Not Disturb—to minimize interruptions. In short, plan, preview, and review before you publish.
Troubleshooting common issues you might encounter
If Screen Recording isn’t appearing in Control Center, revisit the customization settings and confirm that you’ve added it to the included controls. If the recording starts but saves with low quality, check storage space or close unused apps that could impact performance. A common issue is the microphone audio not recording; ensure Microphone Audio is toggled on when you begin. If the app content refuses to record due to DRM, there’s no workaround other than capturing in-app on-screen steps that do not involve restricted content, or using permissible content. Always restart your device if a feature behaves erratically, and update to the latest iOS version to benefit from bug fixes and performance improvements.
Authority sources and further reading
To deepen your understanding, consult reputable sources that cover iPhone screen recording and privacy best practices. Apple Support provides official guidance on how to use screen recording and manage permissions. For broader context and practical tips, technology publications like Tom’s Guide and CNET offer user-friendly how-tos and troubleshooting advice. These sources can help verify steps, expand on best practices, and provide additional screenshots or videos to supplement your experience.
Quick-start checklist for new screen recorders
- Add Screen Recording to Control Center.
- Decide whether to enable Microphone Audio.
- Do a quick test recording to confirm audio and video capture.
- Review your clip in Photos and trim as needed.
- Save and share with clear context and permissions in mind.
Tools & Materials
- iPhone with iOS 11 or later(Screen Recording is built into iOS; ensure your device is updated.)
- Control Center access(Add Screen Recording to Control Center via Settings > Control Center > Customize Controls.)
- Microphone (optional)(Enable Microphone Audio if you want narration during the recording.)
- Stable workspace (optional)(A tripod or stand helps keep the screen steady for tutorials.)
- Phone charging option (optional)(Long recordings benefit from a power source to avoid interruptions.)
- Video editing app (optional)(iMovie or a preferred editor helps trim and annotate final videos.)
Steps
Estimated time: 15-30 minutes
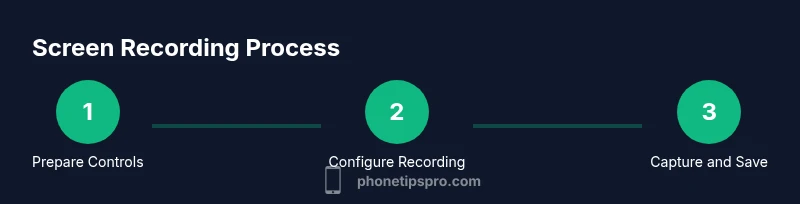
- 1
Prepare Control Center
Open Settings, go to Control Center, and customize controls. Add Screen Recording to the Included Controls so you can access it quickly during a recording.
Tip: Arranging controls by frequency of use saves time during live captures. - 2
Configure microphone and options
In Control Center, press and hold the Screen Recording button to reveal options. Turn Microphone Audio on if you want narration, and check for any other preferences.
Tip: If you’re recording a voice-over, consider a quiet environment to boost clarity. - 3
Start the recording
Tap Start Recording and wait for the three-second countdown. Navigate to the app or settings you want to capture and perform the tasks.
Tip: Do a quick dry run to confirm you’ve captured the essential steps. - 4
Stop and save
Open Control Center and tap the red status bar or the Screen Recording button to stop. The video saves automatically to Photos.
Tip: If you miss the save, check the Photos app under Recents. - 5
Edit if needed
Use Photos or iMovie to trim, reorder, or add captions before sharing.
Tip: Keep critical steps at the start of the video for quick skimming. - 6
Share responsibly
Export or share the final clip via Messages, Email, AirDrop, or cloud storage with proper permissions.
Tip: Redact sensitive data and respect privacy before sharing publicly.
FAQ
Can I record audio without using the microphone on iPhone?
Yes, you can capture system audio from apps that allow it, but some apps block internal audio. If you need narration, enable Microphone Audio. Always verify audio in your preview.
You can record app audio if allowed, and turn on the mic if you want narration. Always check the preview to confirm audio is captured.
Where do screen recordings save on iPhone?
Screen recordings save to the Photos app in the Recents album. You can open Photos and trim or share from there.
They save to Photos. Open Photos to review, edit, and share.
Why can't I see Screen Recording in Control Center?
You may need to add it via Settings > Control Center > Customize Controls. Ensure your device is running a supported iOS version.
If you don’t see it, add Screen Recording under Customize Controls and check your iOS version.
Can I record DRM-protected content like streaming video?
DRM-protected content often cannot be recorded. This is a content protection measure, not a device issue. Check app policies for details.
DRM content may block recording; this varies by app policy.
Is screen recording possible on all iPhone models?
Screen recording is available on iPhone models with iOS 11 or later. Ensure your device is updated to access the feature.
Most iPhones with iOS 11+ support it; update if needed.
Can I edit screen recordings on the iPhone itself?
Yes. Use Photos to trim and annotate, or export to iMovie for more advanced editing.
You can edit in Photos or iMovie to polish your recording.
Watch Video
Quick Summary
- Record the entire on-screen action with optional narration.
- Add Screen Recording to Control Center for quick access.
- DRM restrictions may block content from certain apps.
- Review and edit clips in Photos or iMovie before sharing.
- Respect privacy and permissions to avoid issues when publishing.